ANIMATION RESEARCH

STUDIO


I researched several animators, but deep down I knew what style I wanted anyway. Though sometimes you know exactly what you’re doing and you just want to get on with it, it’s important to explore everything around your particular subject as it may open up a new pathway you didn’t yet consider.


COOL 3D WORLD

This youtube channel specialises in disturbing and unorthodox animation. They make disturbing characters and tell stories that are simple in essence, but make no sense. There is a wave of absurd animation that focus on visuals and tell stories through their design. It is quite beautiful, there is no pressure to make sense, you can do whatever you want. This isn’t an excuse though, nothing about this style of animation isn’t planned out and done randomly even though it looks like it. I feel like a lot of people are quick to diss this style, because it looks random and weird. The hours it takes for it to be made, edited, designed and though out, but also it has to fit with aesthetic of the rest of the other videos is also important. When you make animation you have compassion for the process regardless if it’s bad or good, you can sympathise how difficult it is to make anything.

In terms of the style of the characters this was my vision for my ducks. I wanted it to be 3D, look real, but fake at the same time. It had to look like it could exist, but a loft version of reality. If we look at the early days of Cool 3D World, this is exactly what I was going for. If we compare the progress to today, they have better set designs and sleeker characters with more realistic texture, this what my ambitious side was going for, but for time’s sake I stuck with the loft version. It just released some of the possible stress that comes with making this kind of style especially since it would be my first time. In the end, I did stress making my ducks, but that was due to technical errors.

For the storytelling its very quick-paced and unpredictable which was my biggest challenge. I love how anything can happen at any moment, there are general themes like the Chefs episode it revolves around food but you never know what can happen. In that same episode,  the fear factor is very alive. They effectively use the style to generate fear, the way the characters scream and the contorted faces. The sounds also emphasise the visuals, which is extremely important. You can elevate the animation tenfold with incredible sounds. Have you ever watched a movie with bad sound, low volume, badly recorded voices, badly aligned sound, terrible audio ruins the whole experience. This is something that struck me and I hoped in my animation the sound elevates my work and doesn’t drag it down.


E STINGS

These shorts display the E4 logo in between shows and movies, they are just animations that are weird or quirky or funny and the only goal is to show the logo. They are so quick but so effective. This storytelling was also my goal to just have snappy story that engages the audience, something you want to watch over and over. This is the feeling I want to create with my animation. When the shorts appear on TV they happen so quickly, before instant replay you would have to wait until the commercial break to see them again. There is a small excitement to see if its going to be a different one or a comical one, they always change and it’s a really good way to keep your audience tuned in-between the shows.

Stylistically, they’re all different and some are 3D animations. There is one in particular that spoke to me and its this animator called Cyriak who creates these visually rich and complex animation solely from found footage. Please follow the links to find more Stings.


The Ident Gallery (2019) E4 Stings. Available at: https://theident.gallery/e4-2013-estings.php (Accessed: 3 June 2019)

TV Whirl (2018) E4 rebrand. Available at:https://www.tvwhirl.co.uk/presentation/channel-4/e4-channel/e4-2018-onwards/ (Accessed: 3 June 2019)


CYRIAK

I have watched several of his videos and they’re all different but have a consistent style through out. He collages all this found footage to create a new an enticing narrative, his most famous is the music video he made for the musician Bonobo. This video travels layers incredible amounts of footage that was all cutout and reused over and over again in creative ways following along naturally to the beat of the song. This is an amazing collage, truly mesmerising. This is the next 5 levels above in terms of what I want to make for my animations, I want to simply do a frame by frame animation of my hands opening and closing with collaged pieces. This is video collage. It’s important to know what else is possible and how that can be achieved, if I become serious about animation this is the direction I would like to go in. It really helped me understand the flow of collage, how do I make it look organic and just be, simply be. The whole appeal to collage is the way all the pieces move together. It’s kind of like Howl’s moving castle, the castle has a central goal it moves in one direction and all the pieces follow the main command, but at the same time they’re all doing their own thing simultaneously. The key word is organic, everything in perfect inharmony.


BLENDER WORKSHOPS

STUDIO


Introduction class

In my first ever class for Blender we learned the basic fundamentals to Blender. First things first. Blender, like any other 3D software, operates on an X, Y and Z axis, this means we’re working in a 3D environment. The area is measured in 1m increments, so  if you think about it you’re making gigantic models.

Screen Shot 2019-05-08 at 10.38.14.png


Secondly, just like Photoshop uses pixels, Blender uses polygons and the more polygons an object has the higher the quality and the smoother it is. However, the more polygons you work with the slower your computer will be and you risk the software crashing and losing all your work.


I also learned how to sculpt an object and I tested most of the brushes. The best way to get organic shapes and bumps, is to subdivide the shape you’re working with. This means to add more polygons, the more of those you have the more organic your sculpture will be.


I really enjoyed this class and this showed me how far this software can take me. The possibilities are limitless, I thought there was so much that could be accomplished on Photoshop, but Blender is on a whole new level. The same goes for the difficulty, Blender is 1000x harder and that’s not a joke. I even made a fun little character on my first day.

untitled


Shapes & Materials Class

In this class we learned how to make a surface and use the textures and shaders tab to create colours and shades. In 3D, after sculpting, finding the most realistic colour and reading the most realistic textures is extremely difficult. This tab alone needs hours of dedication to learn how to work it. We made a shiny ball and understood how metallics work, they way the environment reflects off of the ball. We also made a floor and how to make a natural environment.


Physics & Particles Class

This is an introduction to using the basic animation side to blender and probably the most fun bit about blender. This is where you can make particles (little balls) shoot out in any direction from any object. The particles can be made of anything: dogs, stars, hands, anything you can think of. You can also make the particles shoot particles, so the possibilities are truly endless. There is definitely is much more to do in this field, just more out of curiosity. It also explores how to mess with the environment and how it changes the flow of the particles using gravity and wind for example.

We also learned how to make something drop, we explored the physics of the program. For this you need what is called a passive and active surface. One surface is solid and doesn’t move, the receiving end of the action. Then there is the active surface that moves and changes. We dropped a cube into water dropped water into water and saw how it affects the active and passive surfaces. Sadly I lost the photos for this class and have nothing to show for this 😦


Blender is definitely an amazing piece of software, it’s free and extremely versatile and the possibilities are endless. I truly want to explore more and create all sorts of characters that I could later 3D print.

LANGUAGE RESEARCH

STUDIO


This was by far the hardest concept I had to come up with this year. I struggled for weeks to find an idea, let alone a language. My initial plan was to find a language that isn’t common, something that is either secretly spoken or very niche. Something that belongs to a small community. A classmate of mine found out about hobo language and I thought that was absolutely fascinating, that was the kind of thing I was looking for. My efforts in the end proved futile, the harder I looked for a special language the less I found. I certainly did find some interesting subjects, though nothing that excited me.


SECRET LANGUAGES OF BACTERIA

I watched Fatima AlZahra’a Alatraktchi: To detect diseases earlier, let’s speak bacteria’s secret language. This Ted Talk explored how bacteria communicate to each other and determine what goes on in our body. It was a very interesting subject and there was something I could do with it. However, I didn’t feel a connection to the subject and   felt I was going in the wrong direction. I thought they had some kind of code like morse, it was basic chemistry in the end. As incredible as the discovery, it wasn’t something I was passionate about. I couldn’t use the language, because chemistry uses the Latin alphabet, which is prohibited for this project.


POLARI

This was the secret language for English gay men dating from the 19th century all the way to the 1960s. It mixed a variety of slang from Romani, London slang, Sailor slang, thieves cant etc. It was very popular in the Navy as there were a lot fo gay men who joined cruise liners and ships, it was also popular in London and it was a way to protect themselves from society and policemen. Since homosexuality was decriminalised in 1967, its use has declined and is no longer in use, interestingly, mainstream English has borrowed the word naff from Polari. There are two reasons I didn’t use this language: latin alphabet and the unpassionate interest I had towards the language. I think it’s incredible how a whole subculture had a secret language of over 500 words, but it’s not something I was particularly interested to work with. There are a slew of other languages similar to Polari that I discovered. The most important thing when it comes to making art is the connection you need to have towards your subject to make something truly unique to you. It doesn’t have to be your life’s passion, you just need to feel connected to your subject and uphold interest for a significant duration.


ARABIC

I settled for Arabic. Going from a mindset to looking for something so special that no one has ever heard of or worked with to the second most written alphabet in the world. Arabic is famous for its calligraphy, as the Qu’Ran bans holy drawings, so artists across the centuries had to represent it through intricate scriptures.  My reasoning behind this was: it’s better to make something original out of a popular language than making something plain from a secret language.

screen_shot_2010_10_03_at_11_34_38_am.png(mediaclass-portrait-large.88f7636fba7a77601a1d39407ef2e0585a37698d)


First thing I had to do was study the language of Arabic, thankfully I found a book by an ex-CSM student Rana Abou Rjeily who explains the basics of the language. It was a project that explored how Arabic could be more accessible to beginners and offer a quicker learning pace to the language. It is a very difficult and unforgiving, the complexity in the cursive and connected typeface is definitely where its beauty comes from.

NasriKhattar-Pic


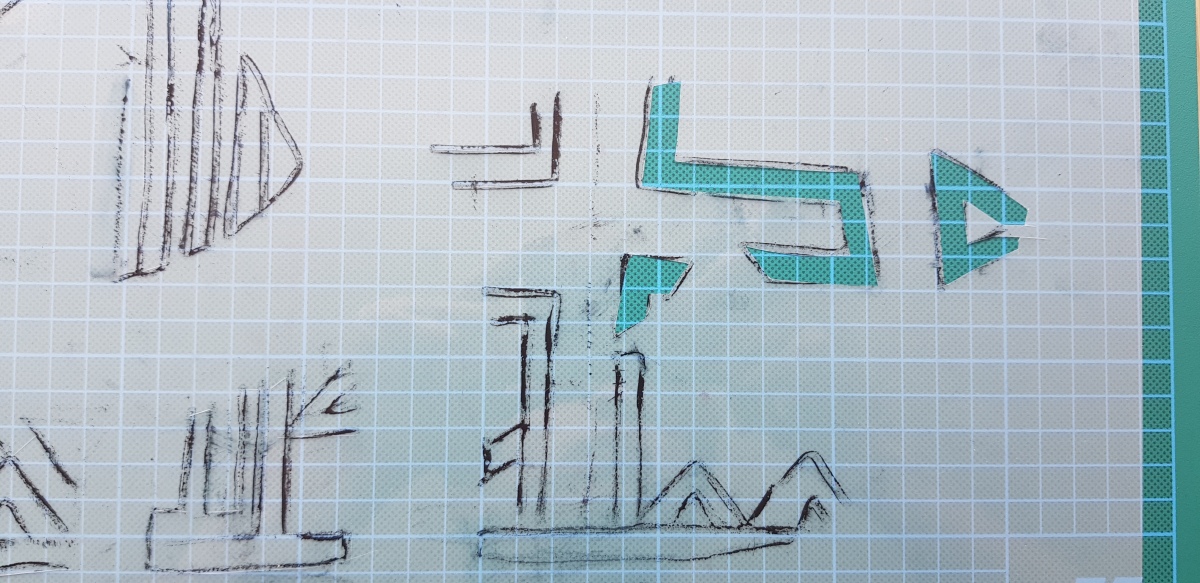
There were attempts in the past by Nasri Khattar and he invented a system called Unified Arabic, which simplified Arabic to the extreme by not only detaching letters but combining all the variations for each letter into one. Unified Arabic was later modified  into Basic Arabic by Mourad and Arlette Boutros. In the Arab world there is Classical Arabic which is the most difficult as it’s the traditional form of Arabic found in the Qu’Ran, colloquial Arabic which changes from village to village, region to region and there is Modern Standard Arabic which is used for media and literature across the Arab world. The language is written horizontally from left to right (except numbers), the numeral system is different as well. Each letter changes shape depending on its location in the word: isolated, beginning, middle and end. This is what makes learning so difficult, the words are cursive and the letters change often which doesn’t help distinguishing anything.  Then come the diacritical marks which change the letter and its sound. The reason for this is that the language is based only of consonances and the diacritical marks represent vowels. Plus, the letters are separated between solar and lunar letters Uppercase and lowercase don’t exist in Arabic and punctuation is flipped from Latin. The sounds ‘vee’, ‘pee’ and ‘g’ as in gulf don’t exist, so they are replaced with alternatives, e.g. bablo bicasso.

cc-1


After learning all of this I felt more connected to my language. Since I knew the roots and basics of this language, I felt confident to explore it visually. It’s kind of like method acting, you need to experience it in order to act it out. Personally, it didn’t feel right to take this language and not know a single thing about it. This was one of the reasons that pushed me to study Arabic, it was the lack of knowledge. We see it so much in media and especially living in London we are often surrounded by signs written in Arabic as well as a diverse Arabic community. My first idea for Arabic actually came from the English words with Arabic roots. We use these words daily, especially alcohol and it was this precise word that got my attention


Moet_Chandon_Magnum__16593.1527758431

Alcohol, Alghul in Arabic, means evil spirit in Arabic, notice where the word ghoul comes from. It’s believed that drinking empties the soul and leaves space for evil spirits to fill those spaces and taking control of you. You do things out of you control and cause heartache and problems, this is why it is banned in some Arab countries as the Qu’Ran forbids it. I though of making a neon green glowing sign that represented the word and place it in a cemetery. I wanted to film it at the dead of night glowing. This was too ‘on-the-nose’, so I scrapped the idea and moved on. I also thought of making an engraving the word in either metal or wood and filling the grooves with alcohol. This wasn’t culturally sensitive and it’s important when working with a cultural that is not yours to know what you can and cannot do. There is a fine line between racism and controversiality and I didn’t want to overstep my boundaries and offend anyone. This idea was obviously scrapped as well. My final idea went into a complete opposite direction and left the word alcohol behind entirely. Instead I focused on the NGO Skateistan.

oliver-chad-foreman-1-750x576


The founder and Executive Director Oliver Percovich started Skateistan back in 2007 when he moved to Afghanistan looking for work. He brought 3 skateboards with him and since then has empowered over 1500 children in Afghanistan, Cambodia and South Africa. It is one of the world’s top NGOs and has changed lives for the better. The Middle Eastern country is war torn and before him there wasn’t much hope or future for the street children and children in general of Kabul, the capital. He began in an emptied fountain and slowly saw the impact of how skateboarding brightened the days of the local children. Most of these kids are beggars or work low-wage jobs with no access to education. Over the years, with funding and help from the citizens, Skateistan was born. It educates and empowers children of any social class or ethnicity through skateboarding and schooling. Kids went from being beggars to skate instructors providing for their family. For me what was really special, is how girls benefited immensely from the organisation. This country was radicalised through the harshest interpretations of Shaira law (religious law) effectively degrading women in every way possible. Read A Thousand Splendid Suns by Khaled Hosseini to understand in more detail the situation for Afghan women. They couldn’t leave the house without a male relative or burqas, entirely domesticated and forced to bare children and care for their husband’s every need. Even after the dissolution of the Taliban’s power in the region their ideals are still part of normal life. Girls can’t play sports or access higher education. Skateboarding was a loophole, because it’s seen as a toy and not a sport, that allowed them to practice it freely and above all empowers them. Today 50% of skaters in Afghanistan are female and its the number one female sport.


My idea was to simply make a skateboard and spray paint the word empower in Arabic on the back. I wasn’t sure what the aesthetics would look like, so I researched Afghan traditional art and fell upon embroidery. This is one of the few things women are allowed to do because it is considered housework. These women express themselves through all sorts o garments and tapestries. They play critical role in decorating homes, keeping their families clothed and making religious pieces. I thought this was perfect as it emulated the struggle of being an Afghan woman and how this practice freed them and soothed their oppression. This was their way of blowing off steam, today girls can skateboard and sport it always more effective to ‘get it all out’. I studied this book called ‘Embroidery in Afghanistan’ and found the section I wanted to use for my skateboard. I see how natural it all came together when I was pursing a topic I genuinely cared about. Things fell into place, it doesn’t mean I didn’t encounter hardships, especially when making the skateboard, but passion far outshines the trouble.


FURTHER READING

To get a better understanding of life as an Afghan I wanted to see what it looks like to be from Afghanistan. I borrowed the book Afghanistan: The Land that Was by photographer couple Roland and Sabrina Michaud. Their travels have documented the daily lives of these people before the massive wave of Western influence bringing new clothes, films and habits. I thought it was beautiful to get an all encompassing view of this mystical country. I felt like I understood a bit better the culture of the kids in the Skateistan project. It showed me where the parents and ancestors come from, the diversity of the people, cultures and traditions.


What is impressive and breath-taking is the ruthless landscape. The high mountains, the boiling summers and frozen winters, this isn’t for the faint-hearted. We are spoiled in London with our little drizzles, living through these extreme conditions is a feat in itself. This why I think skateboarding ties so closely with Afghan culture, the sport is very unforgiving and beautiful like the landscape and it takes a lot of practice to get just a little better. A second aspect is the tight-knit and competitive community of skateboarding. Judging from the pictures, sports plays a big part of Afghan culture, from cock-fights to horseback riding, there is a strong sense of showmanship and display of one’s skills.

Unknown


Just like being Afghan is an extension of your personality, skateboarding is an extension of your body, and you can see how proud these people are to be Afghan like most skaters are proud to be skaters. These are personal opinions I have formed from what I have learned about this country, I may be wrong and I’m opinion to contradiction. I’m just thinking out loud.


Bibliography

Prediagnose (2019) Early Bacterial Detection. Available at: http://www.prediagnose.dk (Accessed: 4 April 2019)

Bassler, B. (2009) How Bacteria “Talk” ,TED Talks.Available at: https://www.ted.com/talks/bonnie_bassler_on_how_bacteria_communicate#t-1060047 (Accessed: 4 April 2019)

AlZahra’a Alatraktchi, F. (2018) The Secret Language of Bacteria, TED Talks. Available at: https://www.ted.com/talks/fatima_alzahra_a_alatraktchi_to_detect_diseases_earlier_let_s_speak_bacteria_s_secret_language?utm_source=newsletter_daily&utm_campaign=daily&utm_medium=email&utm_content=button__2019-03-27 (Accessed: 4 April 2019)

Rjeily, R., A. (2011) Cultural Connectives. Mark Batty Publisher

Fitzpatrick, J. (2012) Skateistan: The Tale of Skateboarding in Afghanistan. Skateistan

Michaud, R., S. (2002) Afghanistan: The Land that Was. Harry, N. Abrams, Inc.

Centlivres-Demont, M. (1976) Popular Art in Afghanistan.

Wittner, B., Thoma, S., Bourquin, N. (2008) Arabesque: Graphic Design from the Arab World and Persia. Gestalten Verlag

Nammour, Y., K. (2014) Nasri Khattar: A Modernist Typotect. Khatt Books

AbiFarès, H., S. (2001) Arabic typography: a comprehensive sourcebook. Saqi Books

MARCO/MACRO/MICRO

11/02/2019 – 15/02/2019

STUDIO: WEEK 1


In the first workshop we explored macro, we made our monster BIG, life size even, so in this workshop we scaled our monster down to the size of a finger. It’s quite metaphorical, because in the beginning when we assess our fears, they appear so big, daunting even and we don’t know how to deal with them. Then scaling it down, we take the power away from them and when it’s smaller than us, we have an easier time to deal with it and get rid of it. Once we had our mini-monster we needed to develop the character and explore who it is, what it is and how it moves. Mine is amalgamation of vices. It is a hideous wo/man that is constantly horny and would do anything for sex, s/he is obsessed to the point it is harassment. S/he would never physically force someone to have sex as she’s to cunning. She would take advantage through peer pressure and breaking their spirit into submission using alcohol and drugs. Her other traits are an obsessive, addictive, aggressive, manipulative, passive personality, s/he is a psychopath and a sociopath, a manic-depressive and a compulsive liar. I was interested by all the vices that fame brings onto a person. How you can go from being a good person to a crackhead. How all the eyes, praise and attention can drive people to insanity and leave them worse off than how they started. The monster is very disgusting and repulsive, but it felt like too much for myself song Isobel and I’m not sure if I should use it for my final storyboard…


FINAL TUTORIAL + CRITIQUE + EXHIBITION

20/05/2019 – 25/05/2019

STUDIO


FINAL TUTORIAL

I presented my idea to my tutor and she could understood my idea and commended the accuracy and vision I had for the final outcome. However, my research was weak. To concretize my idea in all its creepy glory, she suggested starting points for my research. In particular the Uncanny Valley theory, this explains how humans can recognize when something isn’t human no matter how real it looks. Our minds can distinguish an AI face from a human face from subtle details that make us alive and human. The hardest thing for animators is to replicate to high degree the millions of things you need to take into consideration when making hyper-realism, things we don’t realize but we subconsciously know like the way light hits out skin, posture, facial expressions, shadows etc. The problem with creating the feeling of Uncanny is that I need to master 3D modeling and spend months constructing hyper-realistic ducks. Instead, I only had 2 weeks to learn Blender, a 3D modeling software, from the ground up. Instead of killing myself to replicate real life, I decided to go in the opposite direction: make it look wrong. There is one artist I admire called Miguel Vasquez who has mastered both hyper-realistic and off putting, but in an interview he stated it took him 7 months to make the Ed, Edd n Eddy characters. I opted to make things look wrong proportionally, technically and aesthetically on purpose, to save time and create my desired outcome. My best example are the veins on a rubber duck, there’s nothing more wrong than that plus the dimensions don’t correspond to most commercial rubber ducks. She also suggested Family Guy, particularly the episode when the characters become real, this was also done in the Simpsons as well.

The final tutorial was very helpful, it just helped find the right path and finish my animation to the best of my abilities.


FINAL CRITIQUE

I presented my idea and the group responded well to the concept, but we’re hesitant. My point came across and I’m satisfied that what I have been working on will pay off as the creepy aesthetics worked, especially for the ducks. The only problem when delivering my pitch was the clear picture of the final outcome in my mind which couldn’t be translated to the audience.  It’s easy to forget how simple everything may appear in your mind, but how wacky, even stupid, it can appear for others. A good example is when Seth MacFarlane was pitching the idea for his movie Ted, a buddy comedy between a grown man and his childhood teddy bear. Everyone was reluctant, especially Mark Wahlberg, but when you know you’re great idea is going to work deep down inside you, you stop at nothing to make it happen. To this day, Ted set a record for the highest original R-rated comedy opening in history with 54.4 million dollars. This example pertain a little to me as I had success in the final exhibition that no one understood in the final crit.  I had some good advice, in particular from a classmate that recommended Cool 3D World. This is a youtube channel that makes wacky and creepy animations. This was a very good visual aid and it showed me what to do with my animation. It taught me how to use 3D to my advantage and get the biggest reaction out of my audience.


FINAL EXHIBITON

It was in a way the same for my idea, everyone sat there a bit lost and confused. They saw the pieces: the hands and the models of the ducks, but they couldn’t piece it together. When I finally put it all together for the exhibition, they really enjoyed what I had made and some asked to watch it several times. The second year’s also gave me more advice on how to improve it. My concern was that I could it make it creepier, especially with the audio. One of the second year’s stated that because the style wasn’t realistic and it looked lo-fi, I should go deeper into that style. He used my audio as an example, it’s very cheesy and when you hear it just makes you feel weird. This mini exhibition was very useful and it gave me great advice for the future.


I MADE A SKATEBOARD

STUDIO


STEP 1:

Get wood. I bought pre-cut sheets from the Wood Veneer Hub. Make sure the wood isn’t too smooth (read STEP 1) and that it’s high quality wood, preferably US or Canadian maple wood, as you don’t want your board snapping after 1 ollie.


STEP 2:

Aligning the right layers. To make the perfect skateboard you need a sandwich of 7 1.5mm layers of maple wood. 5 layers have the wood grain going parallel to the board and 2 layers with the wood grain going perpendicular, This provides more strength on the skateboard from all the impacts, the pressure is spread in 2 opposite direction instead of one preventing easy breaking. So to simply align the layers: 2 parallel wood grain – 1 perpendicular – 1 parallel – 1 perpendicular – 2 parallel. This is the best combination.


You want your wood to be a bit rough so that all the glue is caught and doesn’t slide away. Once that is done, apply high-quality wood glue and spread enough across the whole surface of each layer and align each glued layer together. Don’t put too much glue as you don’t want any puddles as this will create bumps during the moulding process. If you don’t apply enough you will see your board separate once the glue dries and you need to start STEP 1 all over again.


STEP 3:

Turn on the machine and place the sandwich in the plastic bag with attached nozzle to the machine.  Align the sandwich on the mould and seal the bag. Clamp the edges of the moulds wooden frame to keep it in place to prevent the skateboard from moving. Let the machine do its thing and after 1 hour the skateboard should be moulded, turn off the machine. Leave it in the bag for 3 hours like that you’re sure all the glue has dried and stuck the layers together.


STEP 4:

Check the skateboard and see if they’re any cracks that need to be fixed, usually check this before you glue the skateboard together, but didn’t think much about it and had to fix the problem after causing delays. A ridge formed on the tail of the skateboard. To fix this, cut it down the middle and along the edges of the bump and remove the pieces. Clean the bottom and cut new shapes to fit the hole. Glue the pieces in place. We want to clamp the piece in place and leave it for an hour so we’re sure it’s stuck. Then, place two pieces of plastic and a wooden blocks on both sides of the tail to prevent the clamp from damaging the board. We’re using high grade clamps to hold it down together.


STEP 5:

If your skateboard shows signs of splits on the sides, this means you didn’t spread the glue all the way to the edges and now there are air pockets so more glue needs to be applied. To avoid this reread STEP 1, my wood was too smooth and the glue couldn’t stick more effectively on the wood.

To fix this, I forced the sandwich open a little with a chisel to apply more glue into the gaps. With the high-quality wood glue, pour and shove in the glue with the chisel. If you just apply it over the top with your finger it may look filled, but you need to really get it in there. Another good way is too push the glue down with perpendicular motions with your finger instead of following the lining of the board. Once all your gaps are filled, clamp down the board and let it dry for an hour.


STEP 6:

Trim off the edges of your board to create the rounded shape using a bandsaw and a band sander. Then using a wood polisher, sand off the rough bits on the back of the board to create a smooth finish to spray paint the design later on. DO NOT SAND THE SIDES JUST YET, VERY IMPORTANT.


STEP 7:

To drill the holes we used this pre-made cut-out. The holes are protected by metal screws to not only keep the drill straight but to not ruin the cut-out. The best way to make sure your holes will be aligned in the right place on the skateboard is to draw a line in the middle, but it has to be the exact middle. This is why you don’t sand the sides just yet to give you the most accurate measurements when drawing the line. For the holes don’t place the cutout too close to the tail and nose of the board, because you don’t want the trucks to hang off, make sure the holes closest to the tail and nose are on the flat part right after the curve.

Take time to align the cut-out and once you are sure that it’s exactly in the middle, clamp it down or have a friend hold it firmly, the latter option is easier. Drill the holes quickly at a 90 degree angle, don’t forget to keep drilling when you pull out or you might break the hole.


Once you have made all the holes, switch the drill head for a countersink and drill at a 90 degree angle. The head of the screw should fit comfortably in and shouldn’t stick out, so make sure you drill deep enough.


STEP 7:

With a smooth piece of sandpaper, sand down the edges to create a soft rounded shape. take your time doing this going over again and again until you no longer feel any pieces sticking out. The best way I found to do this was to wrap the piece around the edge and just pass it over again and again, like washing a car. Don’t be afraid to apply pressure.


STEP 8:

Draw out your whole design on a sheet of paper creating a master layer, I suggest colour coding it so you’re sure where each section needs to be traced for each layer of your design. Easy to miss a detail when you work in black and white.

Make the design a bit larger than the back of the deck so you’re sure the design will cover the whole surface, including the rounded edges. I didn’t do this so my edges look unprofessional.

Depending on your design just trace over the section you need on your master layer with the drafting film. Then using a craft knife, cut out the section carefully. It’s easy to get lazy and not follow the design exactly. I did this and it just didn’t look good, even if your design calls to look sloppy, messy or off, it’s best to follow the line. Double check each layer with the master layer to make sure your design fits.

20190606_140227


STEP 9:

In a well ventilated area SECURE THE DRAFTING FILM IN PLACE USING WEIGHTS, TAPE ETC. This is crucial, I worked outside and the wind continuously picked up the drafting film and it created a space between the film and the skateboard. You will end up with lots of tiny dots of the edges of each layer. Your design you won’t be clean (unless you want that style). When you spray SHAKE WELL or else you will have a blotchy spot full of foamy bubbles, this happened to me as well. Don’t spray too close to the board and do it in bursts, spray an area then stop, immediately spray the rest. Make sure you spray all over, because you will lose time if you miss a spot. Give each layer enough time to dry and make sure to peel the drafting film carefully to not peel the colour away.


CONGRATULATION YOU HAVE MADE A SKATEBOARD!


STEP 10 (OPTIONAL):

If you want to actually skate on your skateboard, I recommend varnishing your design to protect it. It will also make your deck slide better and prevent accidents. It’s up to you if you want to use a matte, semi-glossy to gloss finish. Make sure to paint several layers, preferably 3, and give it enough time to dry in between each. Now that it’s dry, screw on your trucks and wheels, slap on some grip-tape and enjoy your one of a kind skateboard.


THE DUCKS

06/05/2019 – 10/05/2019

STUDIO


For this brief, we had the option of AR (Augmented Reality) or a 20 second animation. I chose the latter so I could practice my animation skills and explore new techniques I haven’t tried before such as rotoscoping, drawn frame-by-frame and the 3D modelling software Blender. The idea is to combine the subject of time with any element from either of our last projects: Hand and Eye or Hybrid Forms. I chose to use the opening and closing hands from the screenprint I made for Hand and Eye. I selected it because, I wanted to play with the simplicity of the gesture. To correlate this to time, we often notice how the years fly by in an instant, all it takes is a memory or a moment of nostalgia to send us back 5, 10 or even 50 years into our past. This instant is mirrored with the few instants it takes to open and close our hands. You see, Time is like a magician and he can make things appear or a disappear. My animation explorers the cycle of life in 4 stages: childhood, adulthood, senior and death. Each cycle is represented by a duck, childhood is a rubber ducky, because this reminds of us when life was as simple as playing in a bathtub with a toy ducky. The second duck is a green Mallard duck, firstly, they look like they wear suits and second an adult duck needs to build a home, start a family and make sure they make enough bread. The third duck is a cooked duck, this represents our senior years, for many reasons, the skin of a cooked duck kind of look likes elderly people, also because like a delicious plate of Peking duck we enjoy now it and this is a time in our lives where we enjoy life. Also because death is around the corner to eat us up and this leads us to our 4th duck which is a duck carcass.

The idea behind my animation is simple: a pair of hands opens and reveals a duck, out closes and it reveals another duck and so on. I had a concept, but I spent a bit of time relating it to the concept of time and I’m very happy I found out what to do. I believe my idea is clear and cons and suits this topic perfectly.


S5-Cyclical-Structures


I also looked into cyclical narrative as I wanted a looping animation. This is a narrative that ends where it begins. I chose this because I wanted to be able to show my work infinitely, since the cycle of life repeats itself endlessly it was important that I accomplished this. It makes more sense when it plays over and over again. I looked at SlimJim Studios and their looping animations, this is a really fun and explorative artistic practice and great way to train my animation muscles.


thumb_betterbutts


Please follow this link to understand what I mean: http://www.slimjimstudios.com

Images

Big W (2019) Giant Rubber Duck. Available at: https://www.bigw.com.au/product/giant-rubber-duck/p/672000/ (Accessed: 3 June 2019)

CEA (2019) Cyclical Narrative. Available at: http://ccea.org.uk/curriculum/key_stage_3/areas_learning/english_media_education/creative_writing/structure/narrative (Accessed: 3 June 2019)

Reago, A., McClarren, C. (2019) Mallard duck. Available at: https://www.thespruce.com/pictures-of-mallards-4121965 (Accessed: 3 June 2019)

MANAKUSTRA (2017) Duck Master’s whole roast duck. Available at: https://www.tnp.sg/lifestyle/makan/makansutra-duck-there-price-war Accessed: 3 June 2019)

Masai Gallery (2019) Philippine Duck – Skeleton – Anas luzonica. Available at:https://www.masaigallery.com/en/product/canard-des-philippinnes/ (Accessed: 3 June 2019)

SlimJim Studios (2019) Butts. Available at; http://www.slimjimstudios.com (Accessed: 3 June 2019)


WALKING TYPE

 11/03/2019 – 15/03/2019

STUDIO: WEEK 5


To better understand typography there is no better place then to walk through city, town or even a village. To observe every sign, poster, sticker, flyer, billboard, magazine cover, brand, menu, tag, etc. You start noticing things you never did before, your looking higher up and closer to the ground. Paula Scher in the Netflix documentary Abstract makes two interesting remarks about typography. Before we start, I would like to introduce Paula Scher. I didn’t know who she was until a few weeks ago and feel ridiculous as an art student not knowing who she is. Paula Scher is probably one of the greatest designers of all time, and the most famous from the influential graphic design society Pentagram. She is a decorated veteran who has modelled and reshaped letters in beautiful ways and transforming the landscape for emerging designers. You pretty much cannot call yourself a graphic designer if you don’t know Paula Scher. She has worked with some of the biggest names in the industry such as: Coca-Cola, Microsoft and MoMa just to name a few.


paula_scher_1500x1500


The first thing she says: “I walk out and I see typography everywhere”.  This is inherently true when you go out and you actually see letters everywhere, more than you did before. It almost becomes overwhelming because until you notice how many letters surround us on a daily basis, it’s like we’re sharing the city with people and words. Not only are the letters in different languages, but also widths, heights, weights, sizes. Every human says things in a different way contributing to its environment in its own unique fashion, words do the same. Yes you could argue that we do see a lot of Helvetica, a Neo-grostesque typeface designed by Max Miedinger and Eduard Hoffman, because of how readable and universally recognised it is. This is the typeface that revolutionised design.


However, even though the same type is used in similar ways it will always mean something else. No two humans are the same, we’re long, short, wide, skinny and it’s no different for letters. For me, this is the beauty of typography and leads to the second point she makes: “typography is painting with words”. It’s true, we can bend the shapes, rearrange them, move them, distort them and we can still get the message across, but the feeling  and the energy is different, they come to life and breathe, by being manipulated they’re saying it better. A great example is Paula Scher’s work on the Public Theatre in New York. In the show, she opens a book and show us a page with R’s and she explains:

“I like American Wood type because its powerful, and it has many forms. On this particular page were these R’s, they go back to the skinniest form or to the widest form, and I realised I could make the word “Public” in the same kind of weights, and it would symbolize all of New York. Every type of weight was included.”


ps-public-full-239


This logo is inclusive and explanatory in so many ways. By making each letter a different weight she made the word “Public” more public. She used an American typeface, because she’s dealing with an American audience. She also chose a very bold and powerful typefaces that embodies the gritty New York graffiti, street identity and she gave the public theatre a personality, one that reflects the people it attracts. I think this illustrates the power of typography, it can stand for something and it is confirmed by Pentagram’s description of her work:

“The identity responded to The Public’s mission to provide accessible and innovative performances, creating a graphic language that reflects street typography in its extremely active, unconventional and almost graffiti-like juxtaposition.”

It wasn’t distancing itself from its clients, but resembling them and being loud, proud and open about it. The posters speak for themselves.


How this reflects in my practice was with a walking trip I did with me class. We were given a black square where we had to cut out the white centre square and use it as a cropping tool. I could have looked through it and taken a picture of what I saw, instead I held up my cropping tool and snapped a picture of the immediate crop I saw. This small effort I made for each picture kept me true to the exercise, plus I had the exact crop I wanted. Even though the quality is inferior, I think the aesthetic works really well, it looks more lively and imperfect, it breathes more life like in the streets, not everything is always clear and things go by in blurry haze or you see it rush past you. Sometimes you want to hear the noise of the city in the picture, and other times you don’t. This exercise was very powerful, I felt so connected with my surroundings. In truth, I had watched the episode before and it helped immensely because I was prepared to look up, down, left, right. I knew what to do, I was trailing the group and couldn’t keep focused on what my tutor was saying, because I was so distracted by what I saw that I was in my own world. I definitely want to keep doing this for my own practice and keep my mind exercising design-wise. I had used the cropping square so much it started to bend and my pictures were no longer straight, I solved this by sticking q-tips on the back to hold the square together. Sadly, I lost it like most people lose things: I left it on the tube…


The brief has two parts: ‘The Hunt’ and ‘New Visual Language’. ‘The Hunt’ says we needed to take at least one picture of the following 10 categories:

  1. Classical
  2. Corporate
  3. Deconstructed
  4. Digital
  5. Macro
  6. Micro
  7. Romantic
  8. Useless
  9. Vernacular
  10. Vulgar

Many of the images could fit in different categories, but each image is where it should be by its most relevant characteristic.

‘New Visual Language’ wants us to reconstruct our data and challenge us on how to display it. I made a collage and a video so that you could relive my experience on the walking trip. I went to several places around London and continued the exercise way into the next day. My locations include: St. Pancras International, Camberwell, Walworth Road, Euston, Elephant & Castle, LCC, Brixton, Old Spitalfields Market and Brick Lane. The collage is a refined version of the video where I included every picture I took. If you look closely at the collage, I tell a story and each image surrounds the next for a reason, for example the TFL jacket that says: “Here to help” is right next to a crucified Jesus, another would be the pot that says ‘Royal’ next to a picture of Prince William and his family. I needed to think carefully about the placement of each image. I tried a colour scheme and placing the images in chronological order from left to right, but neither worked to the collage’s best advantage. I could have also grouped them by location, but once you go down that rabbit hole I could spend months making categories and subcategories for each image. Instead I opted to tell a story and group the images around each other in common themes: numbers, religion, culture etc.

Here is the collage I made along with an inverted image, because I like the look of it and it gives the whole exercise a different feel. It’s also interesting how flat the inverted version is compared to the normal one, it’s more blue and orange where as the original is more colourful.


walking type collage normal


The video is entirely square because of the shape of the cropping tool. It’s very quick paced and if you stare into the middle without moving you feel like you’re getting sucked in. The image appears three times, but is cropped differently causing the video to zoom in giving that ‘sucked in’ feeling. It starts with me holding the cropping square, to the full image with a black border, to a specific detail that caught my eye.


The video progresses chronologically, from the moment we started until I lost the cropping tool on the Bakerloo. I’m very pleased with the final outcome and it did go through a few iterations. I initially wanted to have the full sized portrait image and then have it cropped to a square image of me holding the cropping tool etc. But with the pace of the video made it too confusing and the black borders dominated instead of the actual image. I then sticked to a square video. When you crop an image it gets smaller, thinking this would look cool if the image would crop down progressively to the detail, however the same problem arose: too much black. Sometimes the crop of the detail was so small all we could see was black, making the video pointless. The final cut is simple, square format and every image is the same size.

Here is the link for my video, enjoy!


Bibliography

Dadich, S (2017) Paula Scher: Graphic Design, Abstract S.1 E.6, Netflix. Available at: https://www.netflix.com (Accessed: 19/03/2019)

Pentagram (2019) Paula Scher. Available at: https://www.pentagram.com/about/paula-scher (Accessed: 19/03/2019)

Pentagram (2019) The Public theatre story. Available at: https://www.pentagram.com/work/the-public-theater/story (Accessed: 19/03/2019)


Images

Available at: https://www.behance.net/gallery/25885151/Silkscreen-HelveticaPosters?utm_medium=email&utm_source=transactional&utm_campaign=project-published (Accessed: 19/03/2019)

Pentagram (2019) Paula Scher. Available at: https://www.pentagram.com/about/paula-scher (Accessed: 19/03/2019)

Pentagram (2019) The Public: Brand Identity. Available at: https://www.pentagram.com/work/the-public-theater (Accessed: 27/03/2019)


TASTE, TASTE, DO YOU LOVE THE TASTE?

22/04/2019 – 26/04/2019

CTS: WEEK 7


hennion-300x460.jpg

Antoine Hennion (2007) stated: “Taste is not an attribute, it is not a property (of a thing or of a person), it is an activity”. This is interesting as we often associate objects with standards like wine and smart clothes, however you liking those things does not mean you have good taste. To have good taste is to know what you are talking about and understand where the things you like – or think you like – come from. Thus, taste comes from a broad education. Would you drink a famous champagne that you do not like just to fit into society’s standards? The answer should always be no.


Moet_Chandon_Magnum__16593.1527758431


If you have only tried Moët and claim it is the best champagne, then you do not know what qualifies a good champagne (I am not downgrading Moët simply using it as an example). I believe you can only judge if something is excellent if you tested other varieties. Good taste means to understand who you are and what you like. Bourdieu states that the rich felt entitled to be the judges of taste because of their wealth. If you are the precursor to a trend then you hold societal power. Most think climbing the social ladder would improve their taste. Sadly, copying whatever the rich do, often ends up as cheap imitation. Though taste in society is still focused on names and status, we are in a new era. Today there is not much that is exclusive to the upper classes, if you earn enough you can get almost anything you want. How does society respond to this, by mixing the social classes up. E.g. Major fashion houses making fishing vests chic. Essentially, ‘taste’ is a power struggle between peers. Since ‘taste’ is status, whoever attends the most sold-out shows and visits the best restaurants builds a portfolio of status. In today’s world, our smartphones are the proof of all the ‘cool’ things we do. What makes taste good is that it is authentic and in a society that is so desperate to find authenticity, we are actually driving it away. At the end of the day, the true amateurs and connoisseurs are those who practice daily, like Hennion said: “it is an activity”. Most importantly, it is practiced discreetly. Taste is humility, you do not recognize your own but you are aware of it and maintain it to your standards while staying true to yourself. Those who seek to elevate their status will run from trend to trend hoping to get there before the rest. I think Sting’s 1988 lyric: “a gentleman will walk but never run” suits this topic perfectly. If you are running after camo pants to Gucci loafers, you will never get to know yourself. You are too busy copying everyone else’s style that you forget your own, ergo you have no taste.


Bibliography

Grief, M. (2010) The Hipster in the Mirror. Available at: https://www.nytimes.com/2010/11/14/books/review/Greif-t.html(Accessed: 30 May 2019)

Hennion, A. (2007) Those Things That Hold Us Together: Taste and Sociology. https://journals.sagepub.com/doi/pdf/10.1177/1749975507073923 (Accessed: 30 May 2019)

Wade, L. (2010) Bourdieu, Hipsters and the Authenticity of Taste. Available at: https://thesocietypages.org/socimages/2010/12/20/bourdieu-the-“hipster”-and-the-authenticity-of-taste/(Accessed: 30 May 2019)

Available at: https://genius.com/Sting-englishman-in-new-york-lyrics(Accessed: 30 May 2019)


Images

Bottleshop (2019) Moet Chandon. Available at: https://www.bottleshop.co.za/moet-chandon-magnum/(Accessed: 4 June 2019)

Editions Métalié (2019) Antoine Hennion. Available at: https://editions-metailie.com/auteur/antoine-hennion/ (Accessed 5 June 2019)

Kirsch, L. (2019) Camo pants. Available at: https://leahkirsch.com/products/orange-camo-pants?variant=1824629129240(Accessed: 4 June 2019)

Designer Kidswear (2019) Gucci silders. Available at: https://www.designerkidswear.ca/junior-pursuit-slides.html(Accessed: 4 June 2019)


YOU’RE NOT THE ONLY ONE WITH (WICKED) PROBLEMS

14/05/2019 – 19/05/2019

CTS: WEEK 6


“For every complex problem there is an answer that is clear, simple and wrong.”

– H. L. Mencken

At the core of a wicked problem is that we cannot solve it, it’s difficult or impossible for a multitude of factors: information is unfinished and contradictory, the number of opinions and people involved, upheaval of inter/national economy and the interconnected nature of the wicked problems. A good example is poverty, the characteristics stay the same, however each country even city has distinct problems that are unique to them. So what may improve one place could worsen another. The importance when tackling wicked problems isn’t to have a solution mindset, instead to approach it with an improvement mindset. The circumstances and the problems are constantly changing and evolving with time, each new approach impacts the situation forcing you to start over whether the progress is positive or negative. The worst part about wicked problems is how interconnected socio-economic political problem is. What happens to one affects the other which will affect the first. If we look at the graph below it goes explains precisely the main points of wicked problems.


Wicked-problems-flower.png


To relate all of this to the quote by Mencken, let’s look at the world epidemic of obesity, the answer is clear: obese people need to workout and eat less unhealthy food.


article-2066060-0EF22A3800000578-10_1024x615_large.jpg


However this is wrong, because not all obese people want to be skinny, not all obese people can lose weight, not all obese people can afford to lose weight, not all obese people can access the help they need. Obesity, contrary to poverty or famine which have been present since the dawn of humanity, is an entirely new problem that we fabricated due to the rise of comfort and technology. It is interesting, wicked problems create more wicked problems. By improving agriculture, accessibility and price of food in a bid to solve famine and malnourishment we tipped the scale without fully solving the initial problem. Was obesity inevitable? Or was the epidemic avoidable? This is what makes wicked problems deeply troubling, because we as a society have put ourselves in situations we can no longer get out off. Now we cannot eradicate obesity without tearing apart the fabric of our societies. One could argue that extremist decisions are the way to go, We would all still exist, but we would destroy everything we have done up until this point. The only real difference that can be made to solve wicked problems is for larger entities to make the decisions necessary to solve the problems at hand. At an individual level we can all do things to make a small difference, success in consistent small actions. It may seem unfair, media and politicians make us feel like we’re at fault and that we need to volunteer and donate to charity. The truth is multibillion dollar corporations are behind most of our problems, e.g. the 100 most powerful companies cause 70% of carbon emissions. In spite of this, it doesn’t prevent us from making a difference. Look at Greta Thunberg, at only 16 she has mobilised 1.2 million people to stand up against climate change. However, we’re not all Greta and  and it’s more than an organised collective of citizens that will make long-lasting impact, help needs to come from our superiors in order to make real lawful change.


Images

CMU Transition design (2019) Wicked Problems. Available at: https://transitiondesignseminarcmu.net/wp-content/uploads/2016/12/Wicked-problems-flower.png  (Accessed: 28 May 2019)

Alamy (2011) Obesity. Available at: https://www.dailymail.co.uk/health/article-2066060/British-women-fattest-Europe-quarter-classed-obese.html (Accessed: 28 May 2019)

View at Medium.com

View at Medium.com

View at Medium.com

Design a site like this with WordPress.com
Get started